OpenAI ChatGPT Image Library: A Complete Guide to Managing Your Generated Images
5 minutes
OpenAI just launched a seemingly small but incredibly impactful new feature inside ChatGPT: the ChatGPT Image Library. Like many people, ChatGPT has become one of my main tools for quick and easy image generation. I've found myself creating images with increasing frequency over the past two years, but unfortunately, one major drawback has remained – actually finding images after I've created them. This is the exact issue that OpenAI has solved with their new "Image Library".
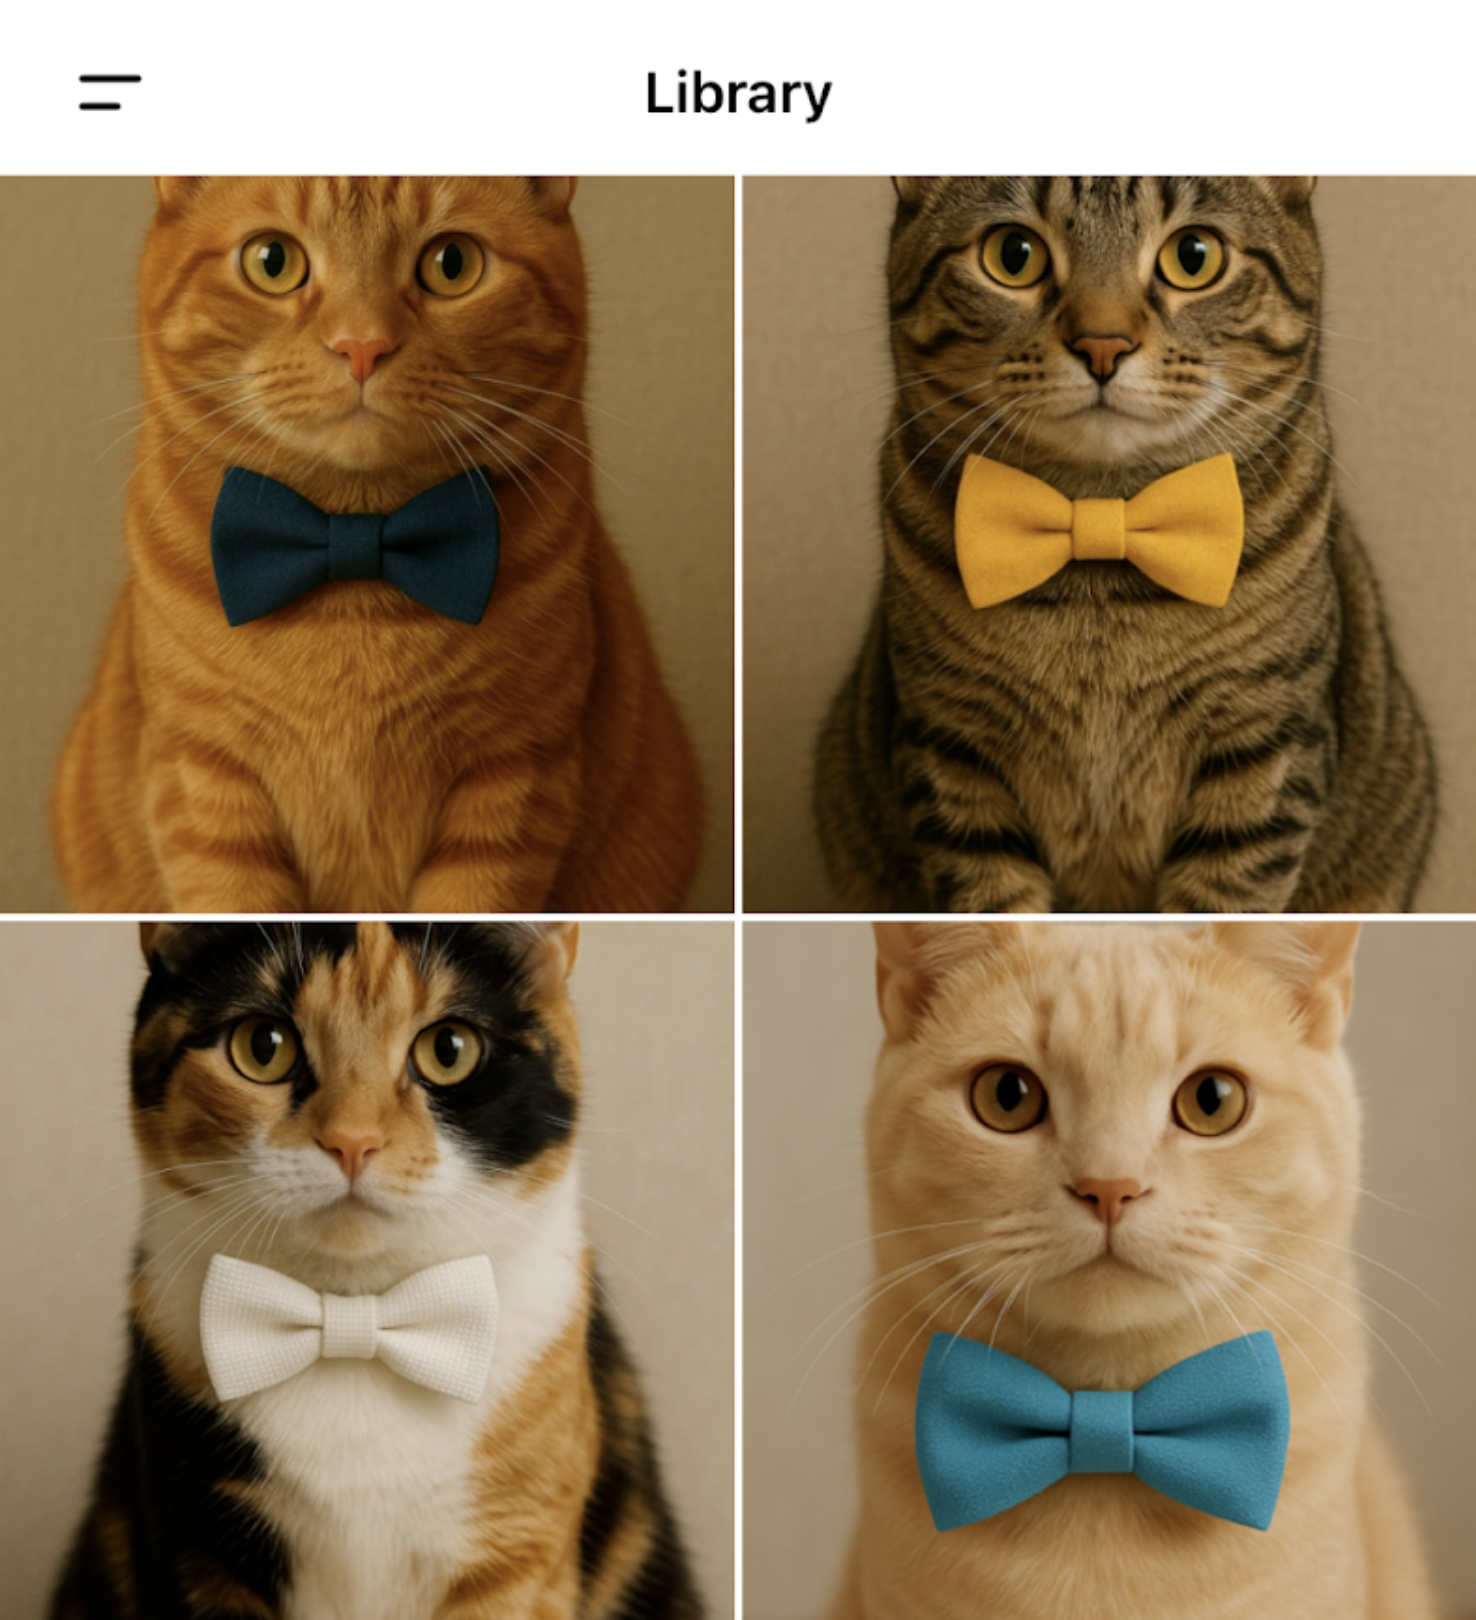
A screenshot of the ChatGPT Image Library interface showing the grid view of generated images. Source: https://help.openai.com/en/articles/11084440-chatgpt-image-library
It's a single, centralized location where all your generated images can be found and interacted with. The best part is that this new update is available to all users, both paid and free! In this guide, I'll walk you through everything you need to know about this exciting new feature.
Want to learn ChatGPT? Check out our list of 15 top online ChatGPT courses!
Getting Started
Accessing the Library
The Image Library can be accessed through the left-hand sidebar in both the web and mobile versions of ChatGPT. Look for the "Library" section, which should appear below your chat history.
While the web version updates automatically, you may need to update your mobile app to see the new feature.
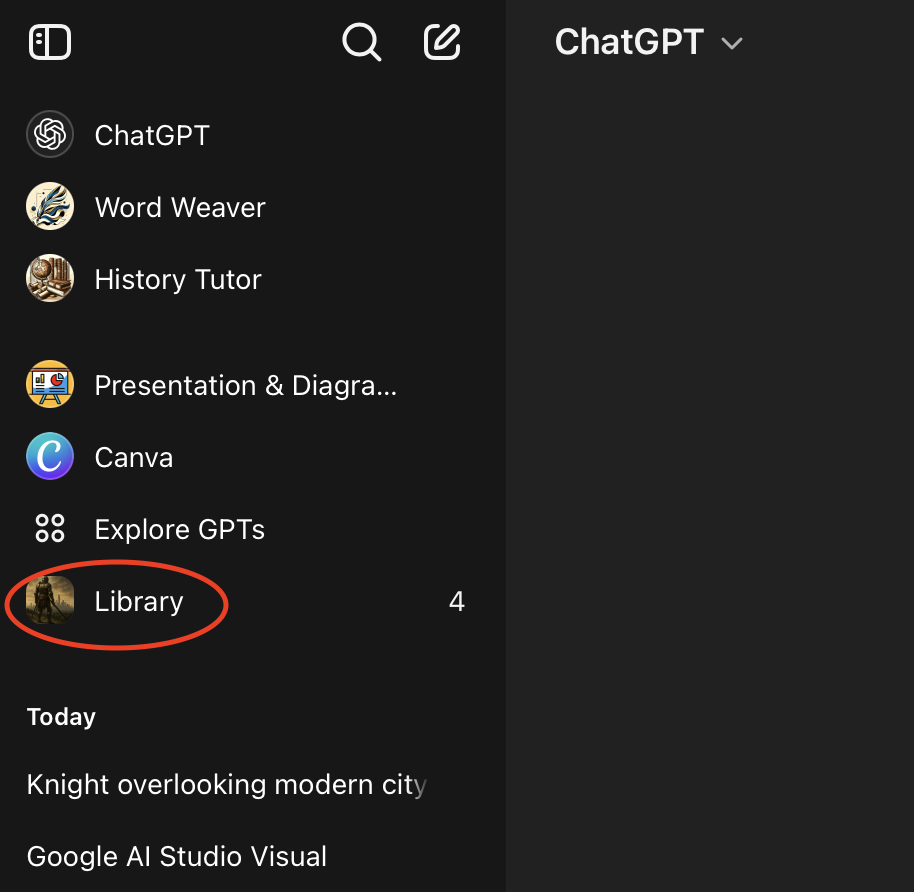
The Library button in the ChatGPT sidebar, located below the chat history.
Viewing Your Images
When you open the Library, you'll see a grid of all your generated images. The interface is designed to be intuitive, similar to your device's photo gallery. You can scroll through your images and quickly find what you're looking for.
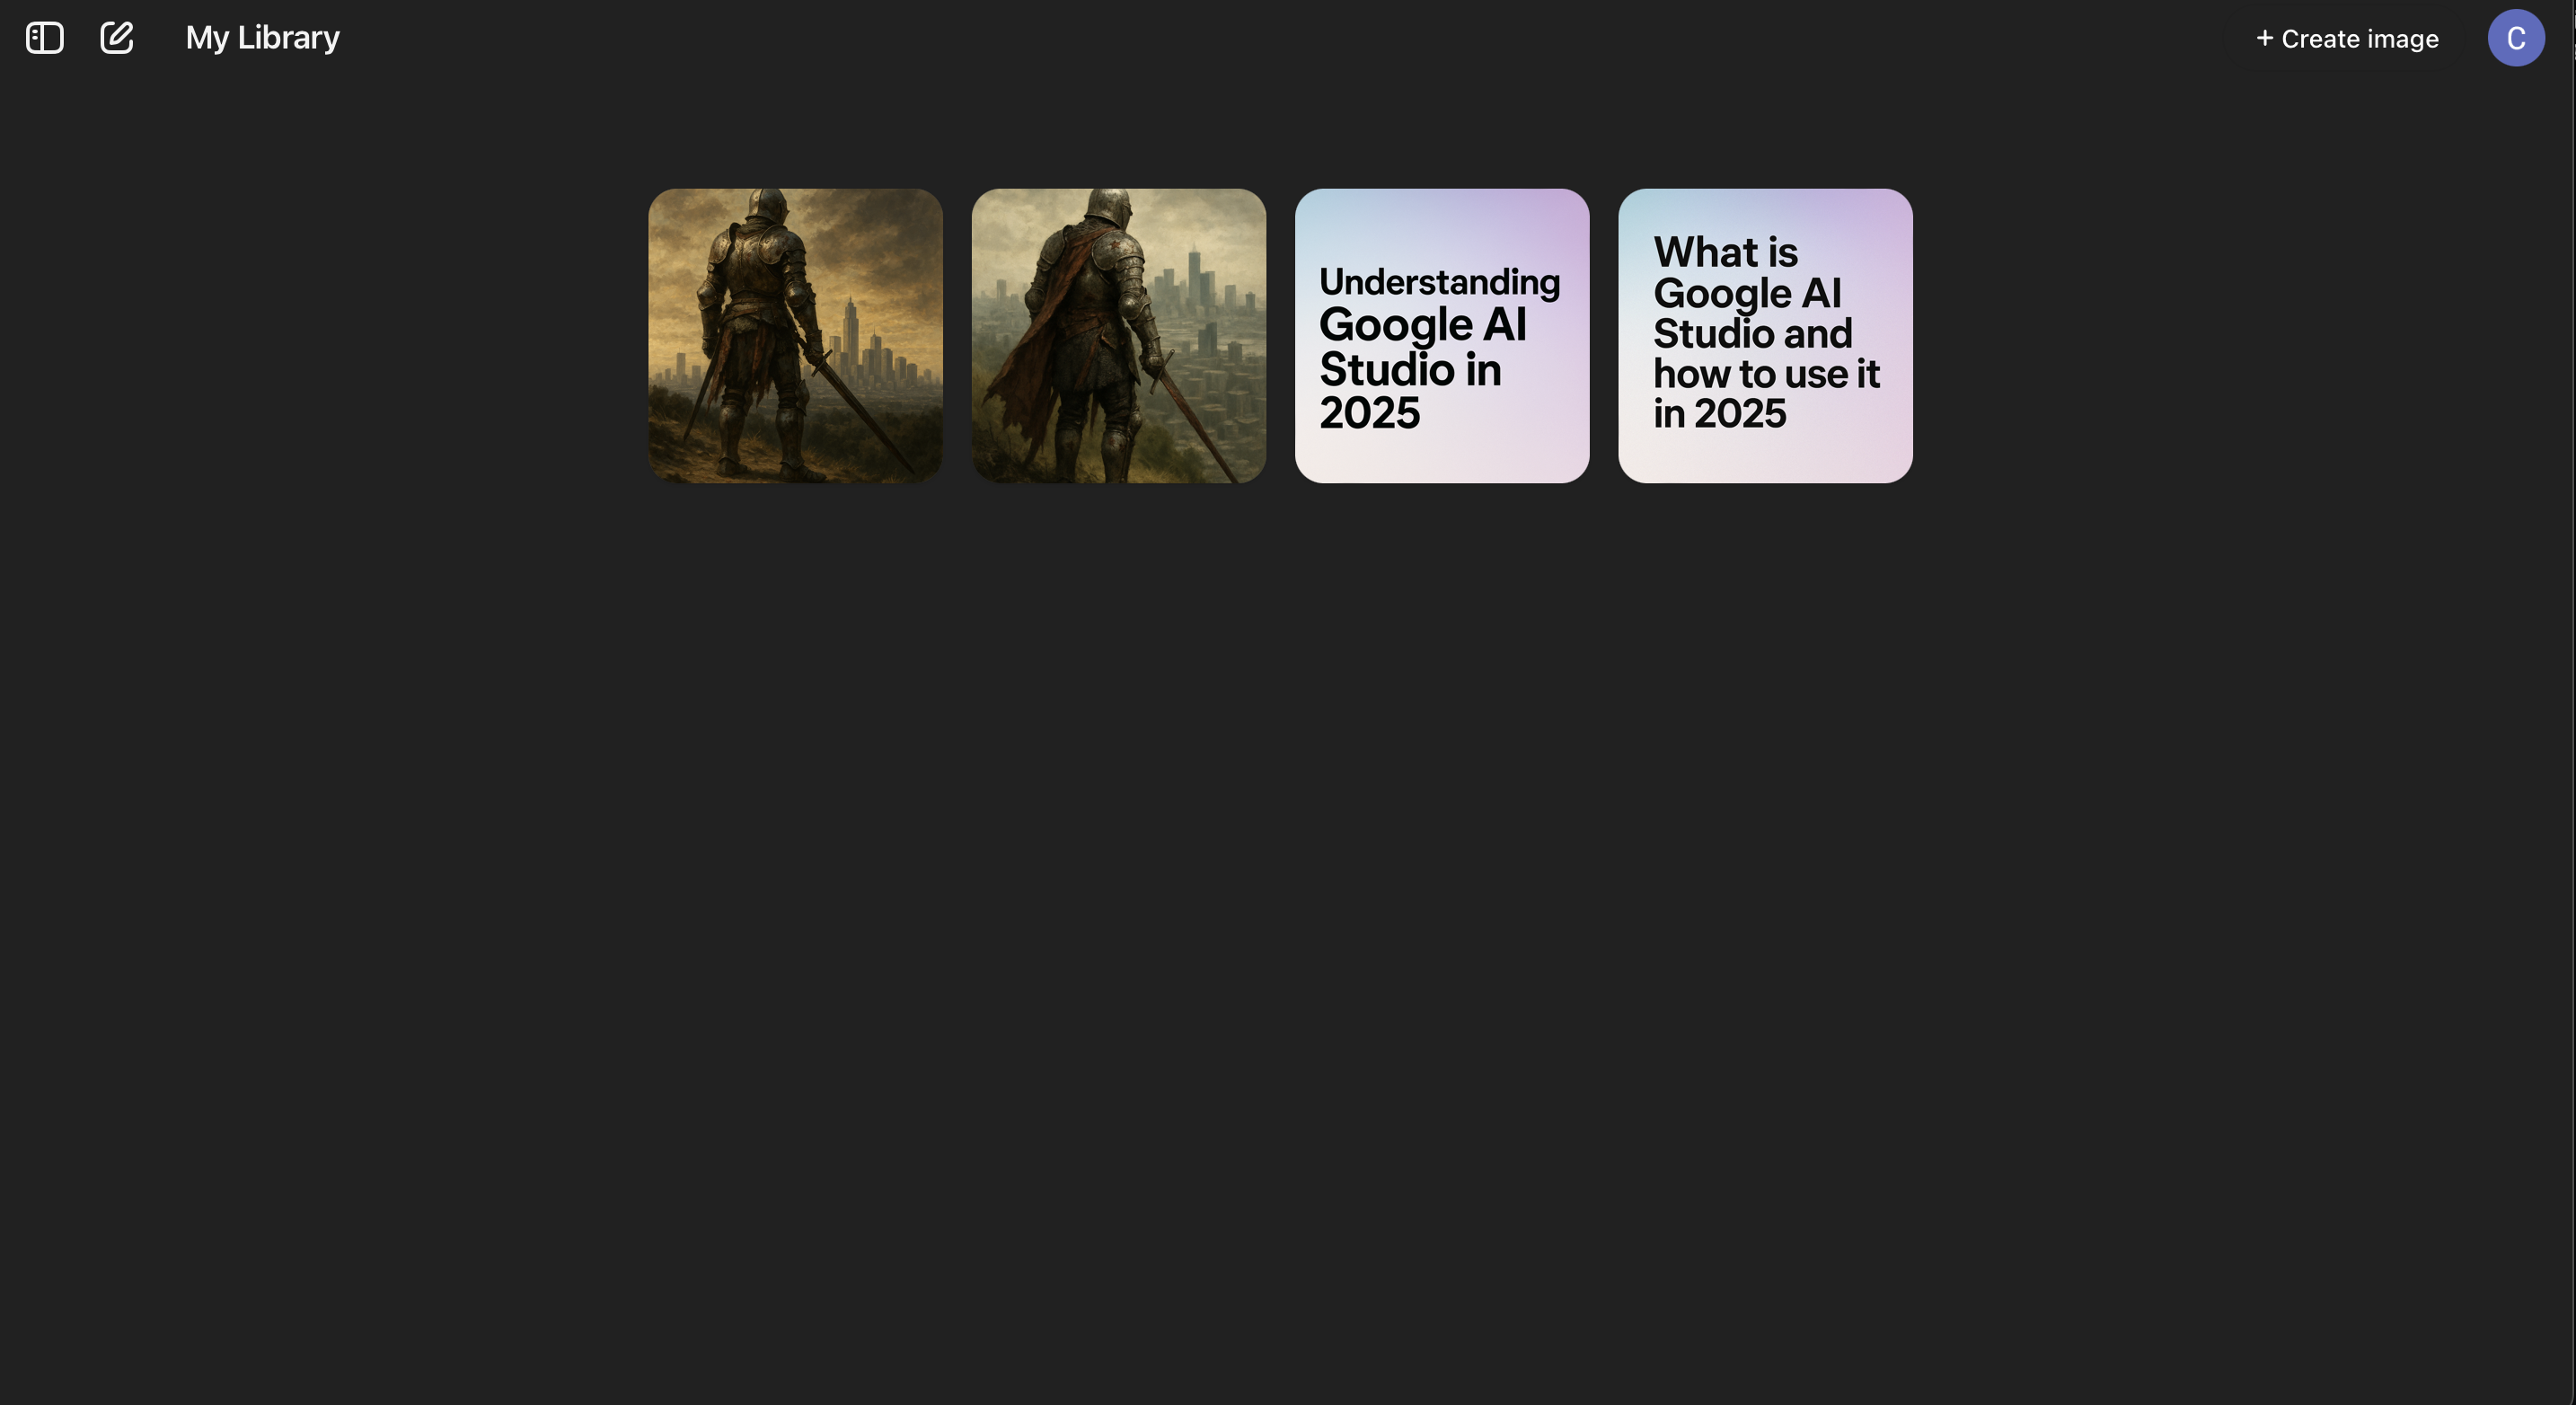
The grid view of the Image Library showing all generated images in a gallery format.
Currently, only images created with the 4o image generation model are included in the Library. OpenAI has already explained that they will be adding your older images to the Library over the next few days.
Managing Your Images
Basic Operations
Each image in your Library can be managed through a simple press-and-hold menu (on mobile) or right-click menu (on web). Here are your options:
- Edit: Opens the image in a new chat where you can provide prompts for modifications
- Select: Activates the selection tool for targeted edits
- Save: Downloads the image to your device
- Share: Opens your device's sharing options
- Copy: Copies the image to your clipboard for pasting elsewhere
Advanced Editing Features
Using the Edit Function
When you choose to edit an image, ChatGPT will open the original conversation where the image was created. This allows you to maintain context while making changes. The editing process works like this:
- Select "Edit" from the image menu
- Provide your edit prompt in the chat
- ChatGPT will generate a new version of the image based on your instructions
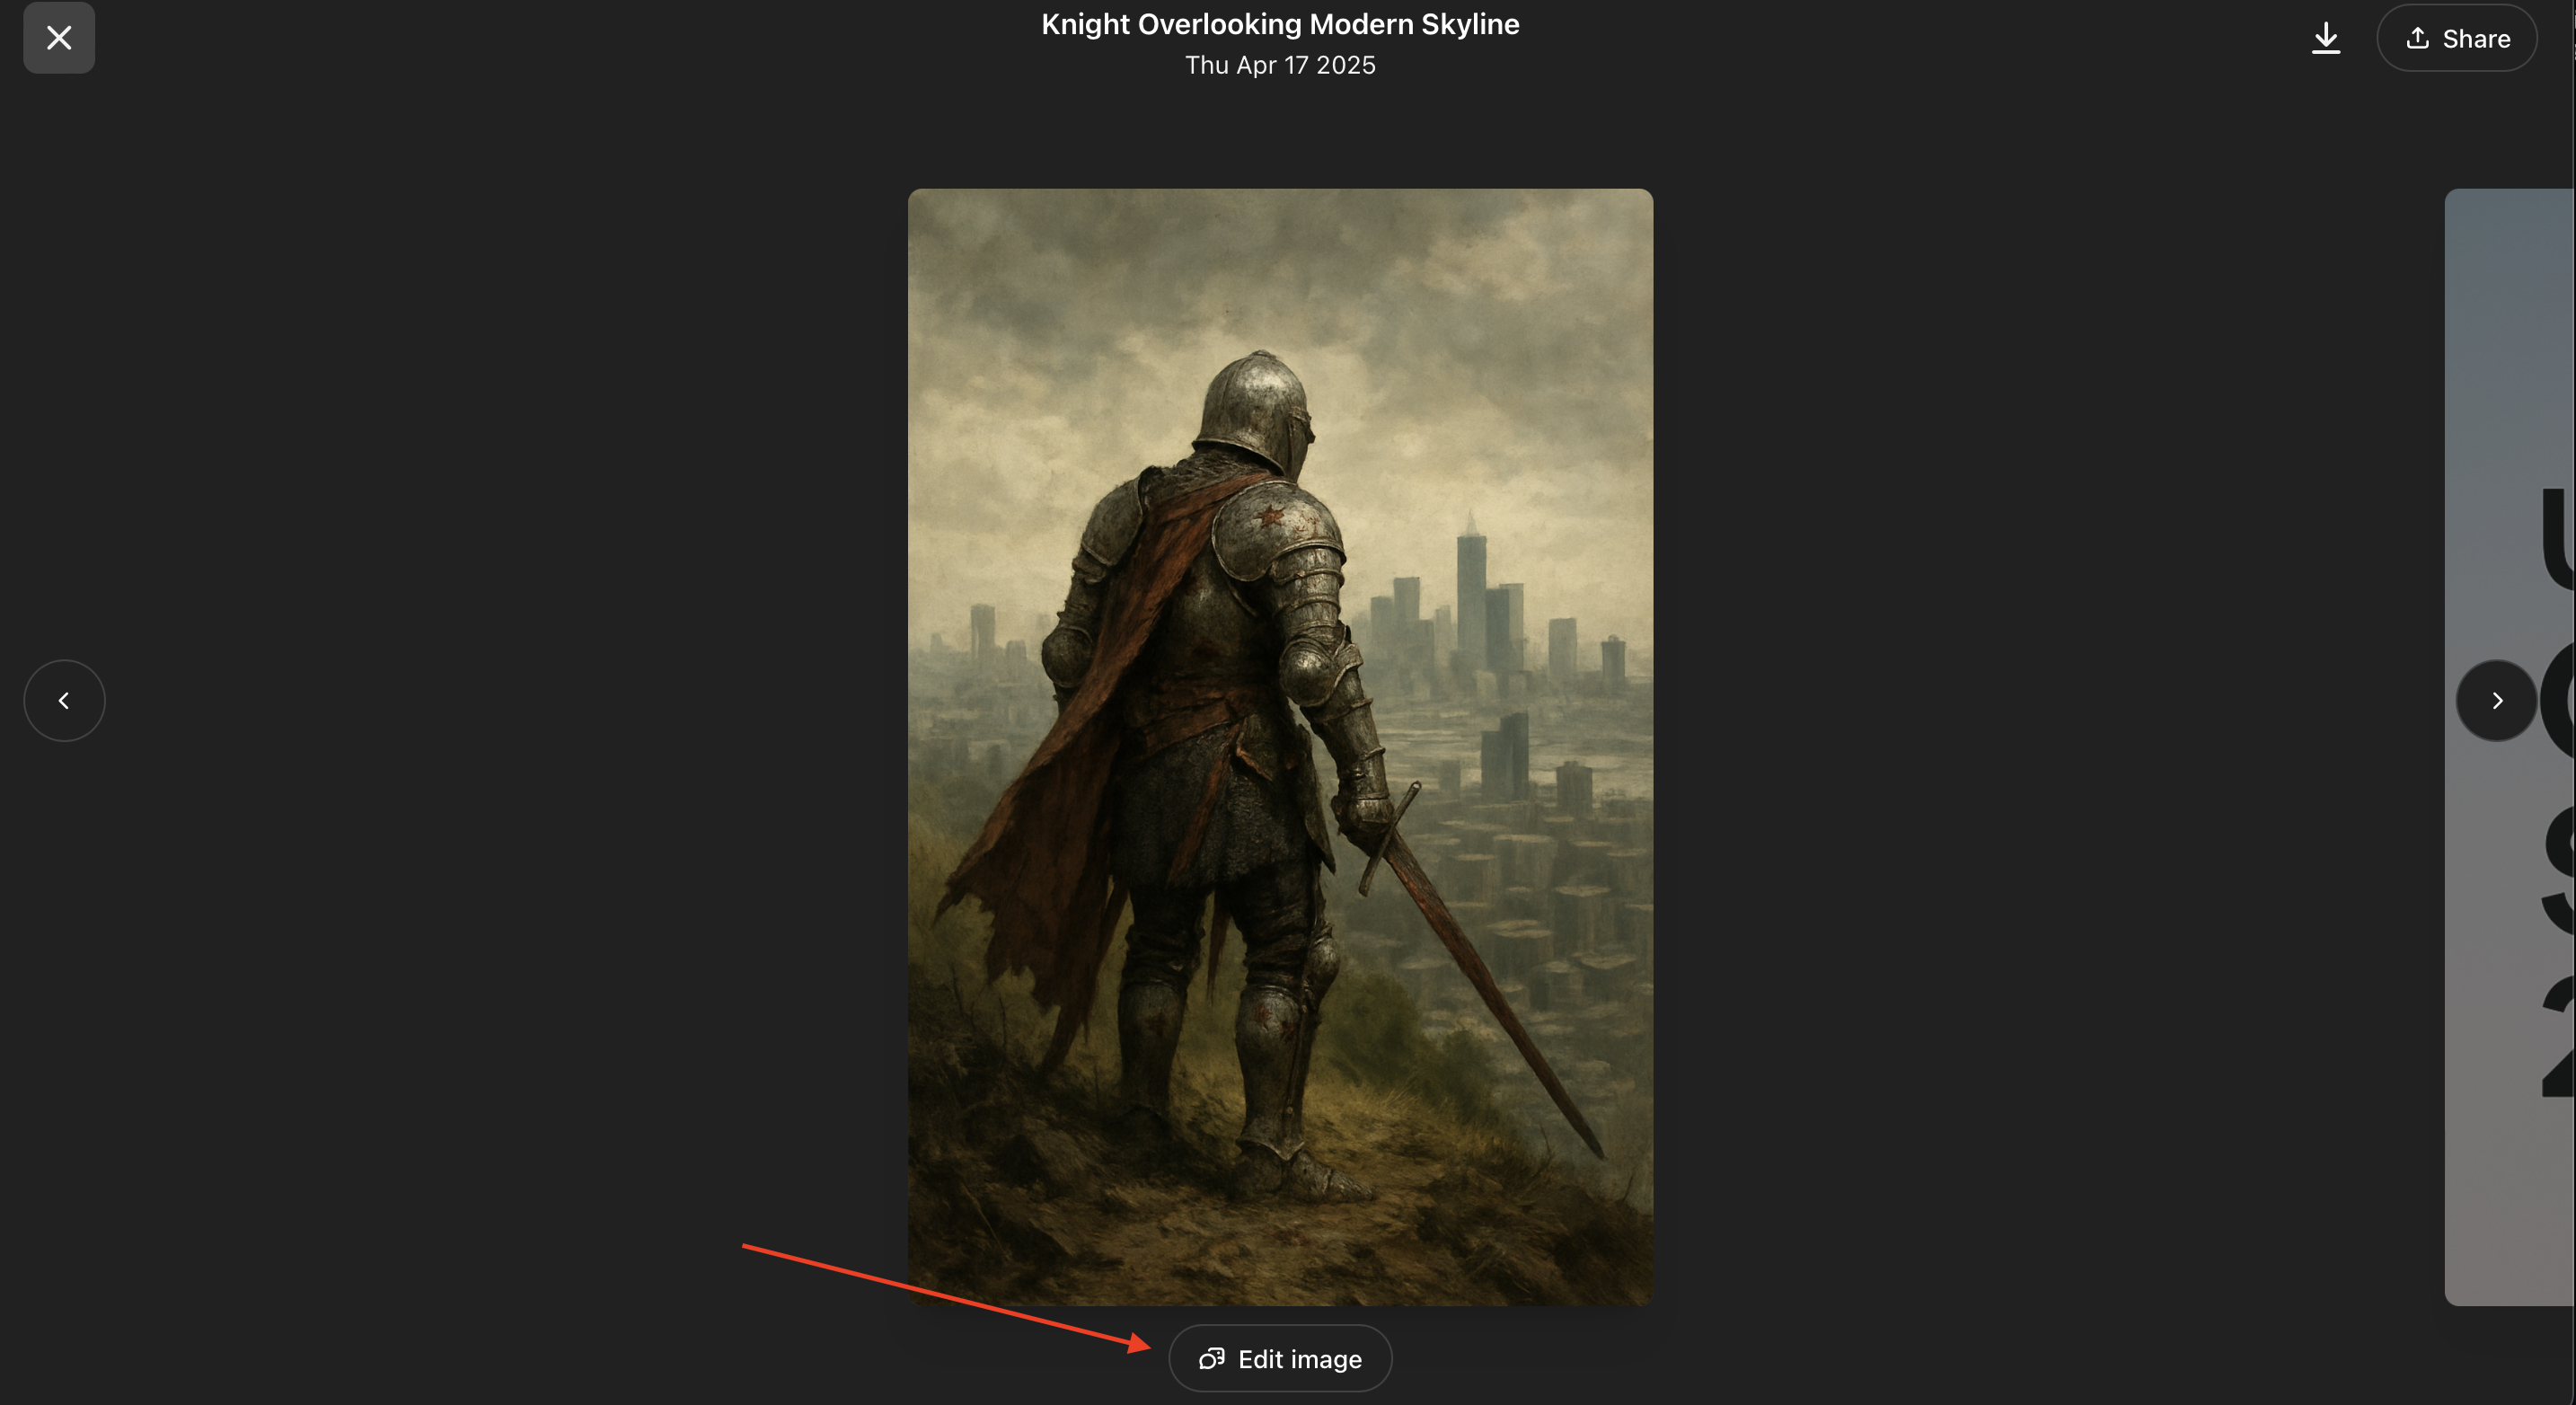
The image editing interface showing the original image and edit button.
Using the Select Tool
For more precise edits, you can use the Select tool:
- Choose "Select" from the image menu
- Use the slider on the left side to adjust the selection tool size
- Highlight the specific area you want to modify
- Use the undo/redo buttons at the bottom to adjust your selection
- Provide your edit prompt for the selected area only
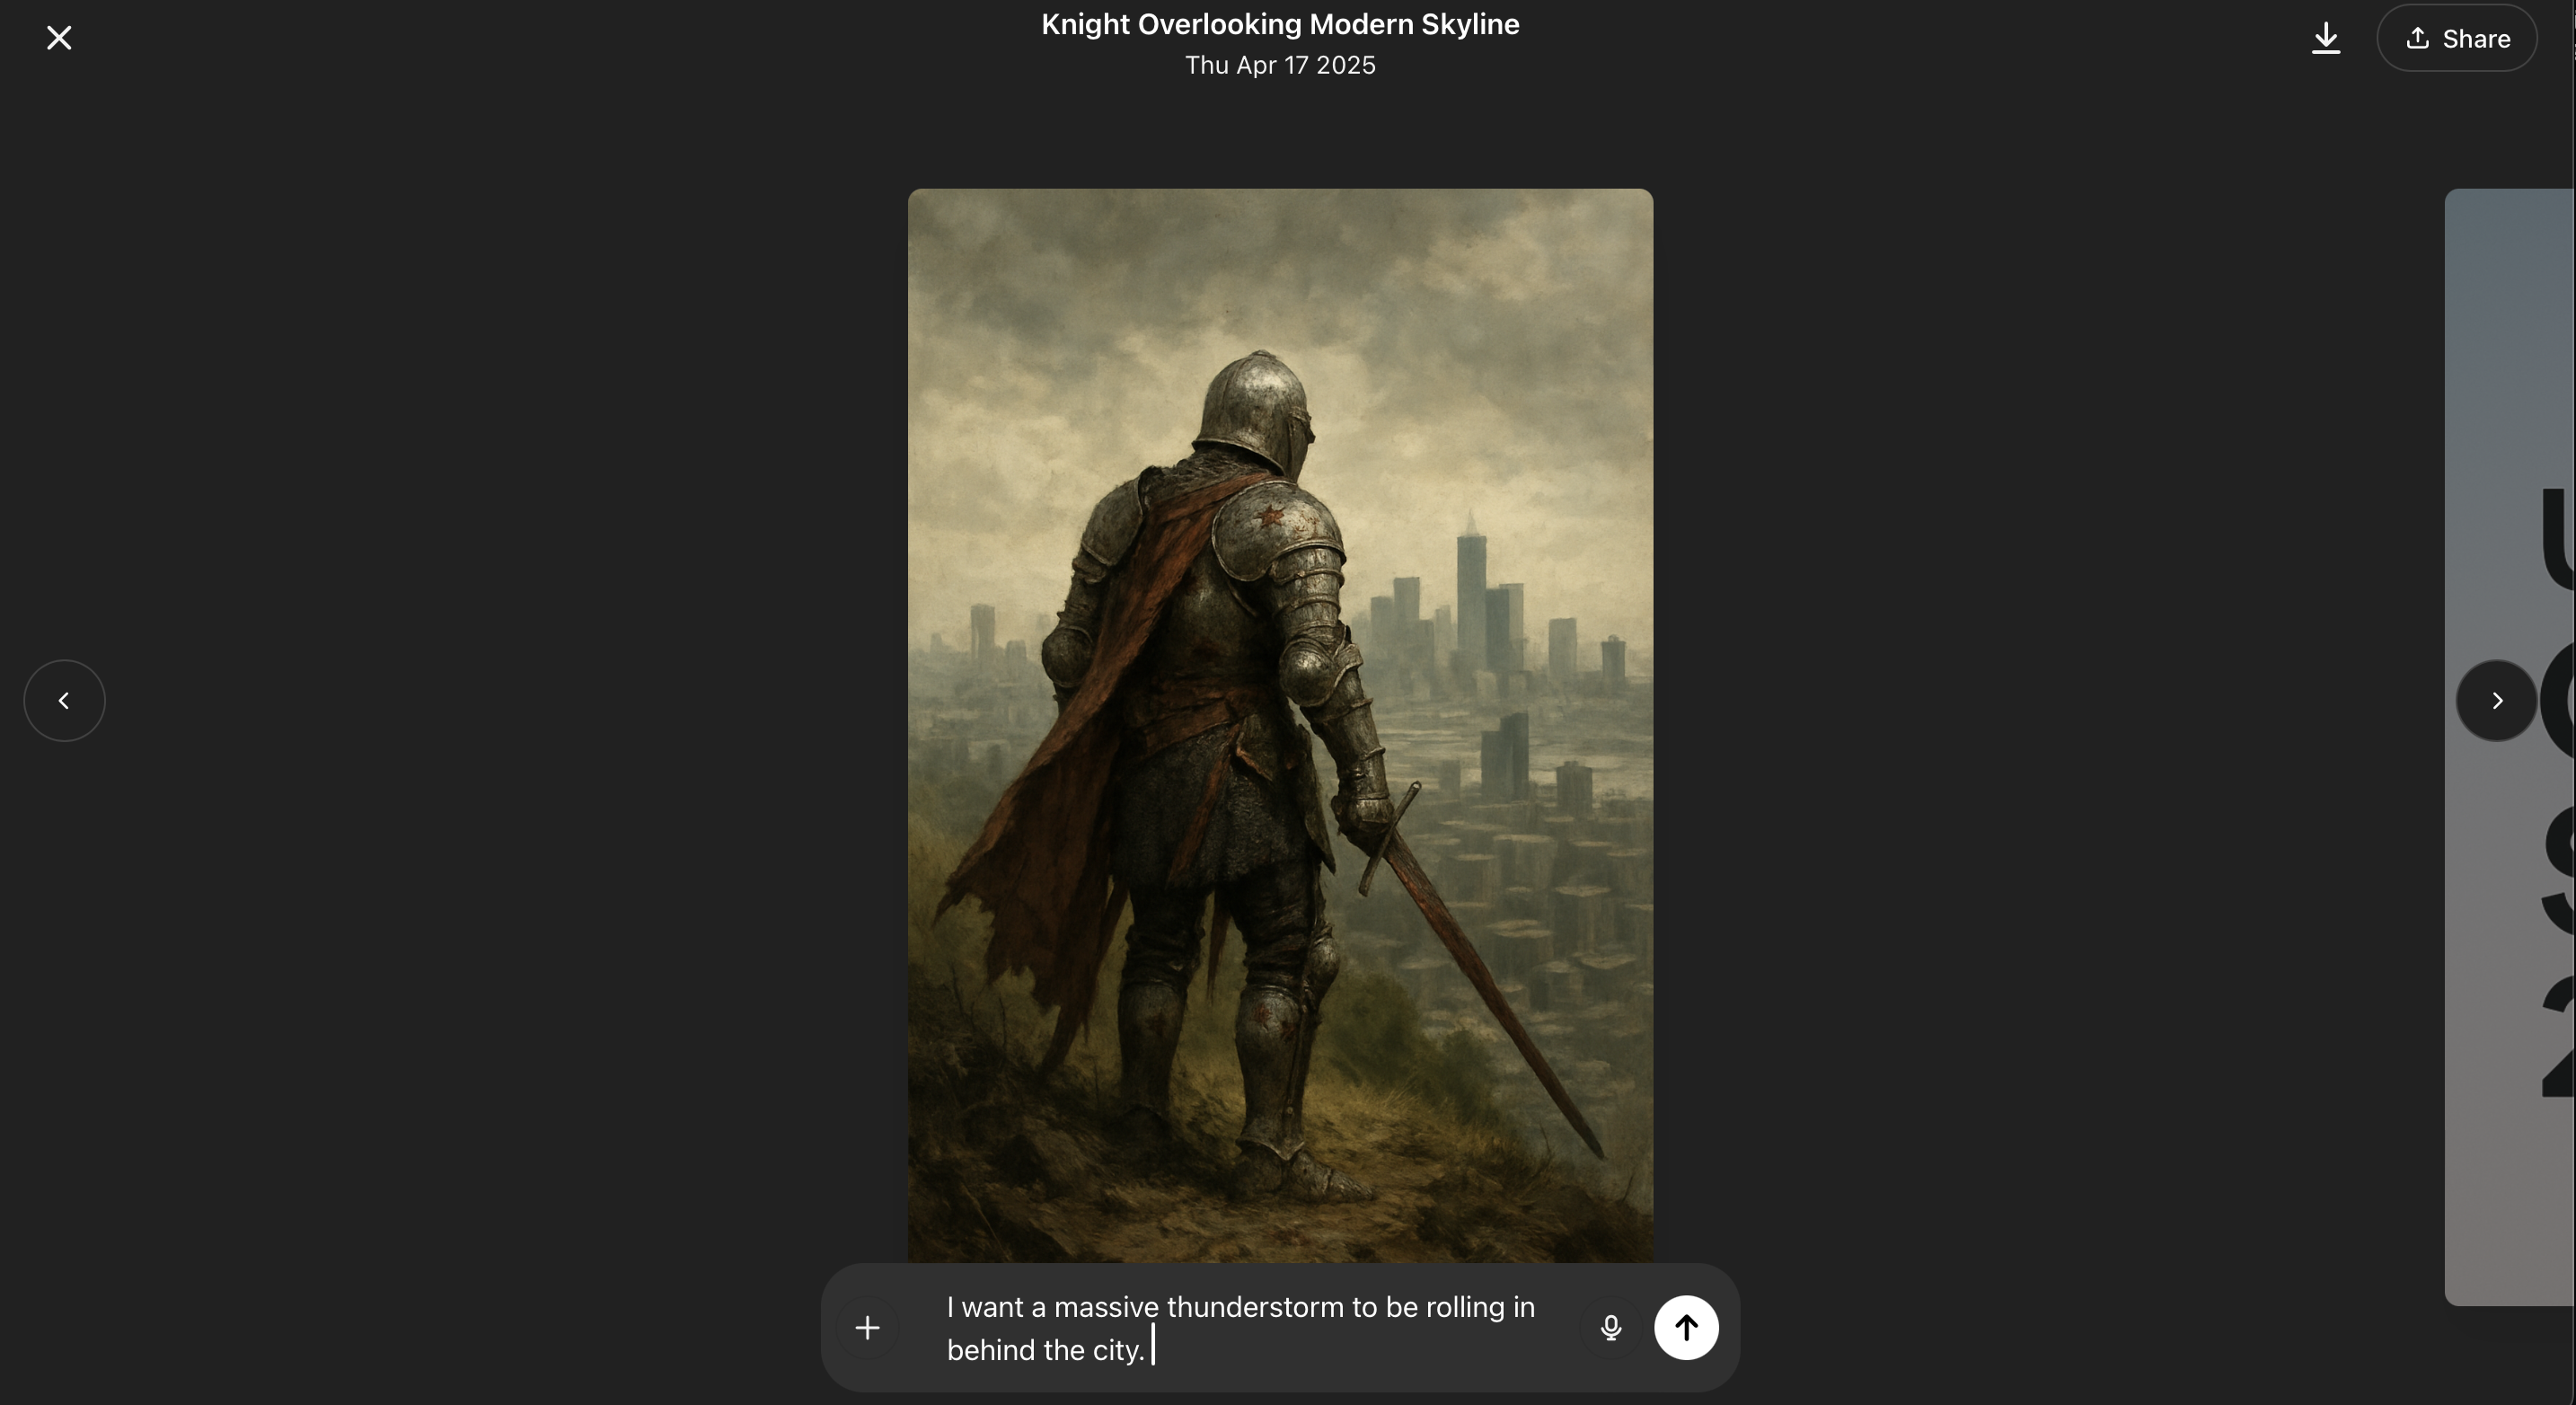
The selection tool interface showing the area selection and adjustment options.
Managing Your Library
Creating New Images
You can quickly create new images directly from the Library by pressing the "Make Image" button. This opens a new chat where you can provide your image generation prompt.
Deleting Images
Currently, to delete an image from your Library, you need to delete the entire conversation where it was created:
- On web: Hover over the conversation title in the sidebar, click the three dots (...), then select Delete
- On mobile: Press and hold the conversation title, then tap Delete in the pop-up menu
This is a current limitation of the Library feature. We hope OpenAI will add a direct delete option in future updates.
Tips for Better Image Generation
To get the most out of ChatGPT's image generation capabilities, consider these tips:
| Tip | Description |
|---|---|
| Be specific | Add as much detail as you can to the prompt. |
| Add style or medium | Try phrases like "in watercolor," "digital art," "oil painting," or "3D render." |
| Describe the mood | Words like "grim," "happy," or "dreamy" help shape the overall tone. |
| Mention the audience | If you're creating something for marketing or education, mention who it's for. |
| Include time of day or weather | Details like "foggy morning" or "golden hour light" can make your image feel more realistic. |
| Use pop culture references | Style cues like "Pixar," "cyberpunk Tokyo," or "Studio Ghibli" give the model a strong creative direction. |
| Ask for variations | Requesting multiple versions can spark new ideas and help refine your vision. |
| Experiment and iterate | Don't be afraid to tweak your prompt little by little until the image feels right. |
Additional Resources
- Image prompting docs where we fully explain how to create prompts that lead to incredible visuals.
- Guide to image generation with 4o model for more tips on how to get the most out of the 4o image generation model.
- Free ChatGPT course for beginners for a quick and useful introduction to ChatGPT.
Conclusion
While this new feature seems simple enough, it makes creating and reusing visuals significantly easier. I also think it takes ChatGPT one step closer to being an image generation platform instead of a chatbot who can create visuals when needed. For those of you who don't use ChatGPT for image generation, check out my guide for some of the best free AI image generators.
Chandler Kilpatrick
Chandler Kilpatrick is a graduate student at Harvard and a Developer Content Writer specializing in AI. With experience as a NASA intern and a graduate of UPenn in Data Analytics and Mathematical Sciences, he simplifies complex AI topics and presents them in clear, accessible ways.
